


Squat. Squat. Squat. There are few movements that activate the nervous system, recruit muscle fibers, and build structural integrity like the squat. In all honesty, there may not actually be any other exercise with as much total-body benefit. And there are so many valuable variations of the squat. One that has received much more awareness due to the increasing popularity of Olympic-style weightlifting is the front squat. You’ve already seen the front squat make cameo appearances in the weight room in the past, but with Olympic weightlifting getting pushed out into the open, thanks to CrossFit putting its stamp on the movement, and the fact that sporting-goods stores now carry specific weightlifting shoes that are used for front squatting, this exercise has been getting more and more exposure.
Some find the front squat more comfortable than the back squat. This preference will vary widely between individuals depending on mobility, flexibility, history of injury, and even femur length. I’m not recommending that you ditch the back squat and only use the front squat, but I am saying that the front squat is a great tool to fully develop your legs. It can be used as a primary heavy mover or a secondary mover. There are some days I’ll program my athletes so the front squat is the finisher for the day. Conversely, our 10/20/Life team uses the front squat as a great follow-up to the deadlift to help accentuate that push from the quads to start the lift. Be safe, have fun, and have a plan.
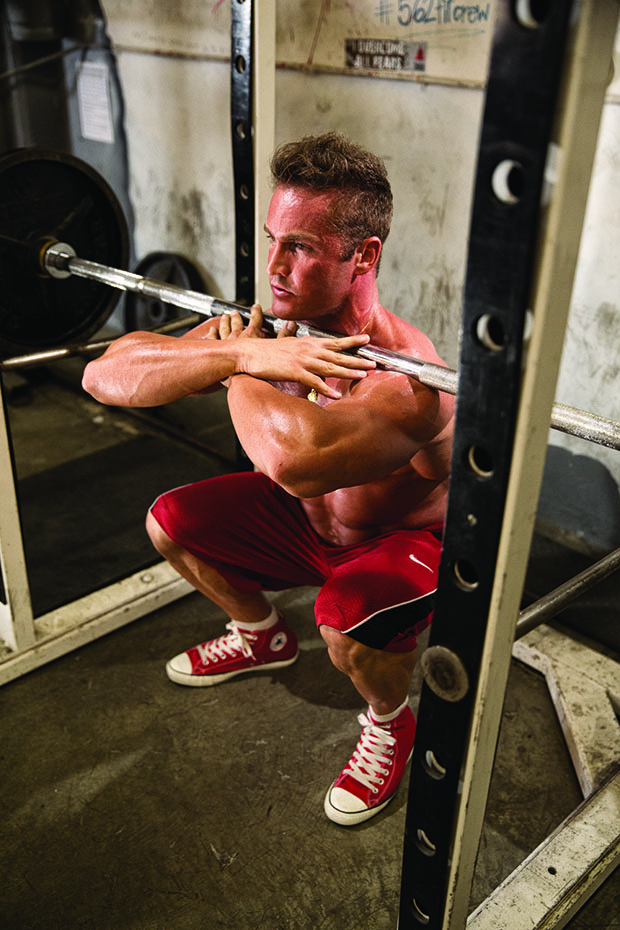
Barbell Setup: The barbell is going to be held and loaded across the front of your shoulders. The stabilization of the weight is in an anterior position and will demand a much more upright positioning with the torso. Set the loaded barbell in a power rack at about the same height you would for a back squat.
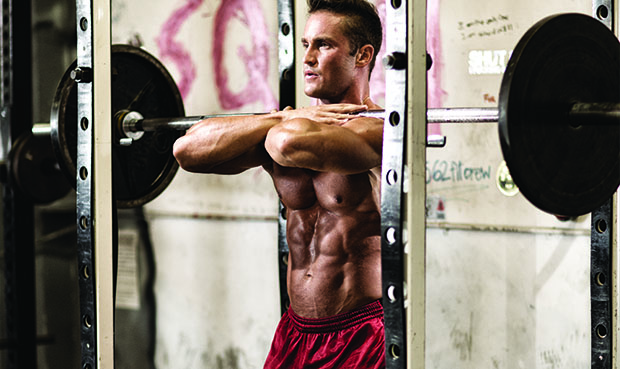
Barbell Loading Position: Here’s where it can get dicey. In a typical front squat, the barbell is in the rack position. This is what is used in Olympic weightlifting and is a precursor to the overhead press as well as clean variations. The bar sits across the front delts, and the hands are relaxed and supporting the bar from underneath. Since the delts are holding the weight like a shelf, it’s okay if the pinkie and ring finger come out from underneath the bar. The most important factor is the elbows. The elbows must remain as elevated as possible. If the elbows drop, the weight will come forward and pitch the whole body out of position.
Front Squat Style: A lot of lifters who have a bodybuilding-style background have a difficult time with the rack position due to mobility limitations, meathead tradition, or just plain comfort. A number of front squatters use the “genie” technique in which their arms are folded over the bar and elbows are elevated. The bar still rests across the crease of the front delts, but the hands do zero work. There are also special pieces of equipment that will help position the bar in the same space with minimal wrist function, and some people even use lifting straps to alleviate discomfort if their wrists don’t have the mobility to get into the rack position. Any of these options are fine. In my opinion, if the purpose is to front squat, the positioning needs to be the safest it can be so the lifter can focus on moving the weight.
What Moves First: There is no difference in the initial movements of a front squat and back squat. In both exercises, the hips must hinge and then drop to load the front squat properly. Considering the position of the barbell, the torso stays more erect in a front squat than a back squat, but the mechanics of the hips must initiate movement. Don’t start the squat with a “full speed” knee bend and dive-bomber drop. Even when watching the best Olympic lifters, guys who are all about speed and power, you will see that it’s the hips and not the knees that initiate and load first.
Find Your Depth: After the hip hinge and descent, you need to make sure to find a good depth. Apologies to all the people who rabidly preach “ass to grass,” but there is no wrong or right depth. You need to make sure that the depth you go to is safe and right for you. If parallel is all you can go without pain, then that’s your depth. If you can safely squat to “Olympic” depth, then that’s okay, too. Try to increase your depth as you become more mobile, but for each workout, make sure your range of motion is safe and pain-free.
Getting Out Of The Hole: Accelerating out of the bottom is key. Drive through your heel and mid-foot, and finish by firing the glutes and hips. You’re going to get a ton of quad, glute, and posterior-chain activation during the whole squat. Just make sure those glutes are coming strong out of the descent and are the main drivers in finishing the lift. There are many varieties of where to stop and hold tension, but for now focus on finishing the lift safely in the upright position.
Direction And Leg Focus: Naturally, with the barbell loaded anteriorly, there will be a tremendous amount of core/trunk stabilization. The quadriceps will be utilized and activated more so than the posterior chain. Kinetically this is just natural, but don’t assume this is an isolation exercise for the quads. There is plenty of work for the glutes and hips, as well as hamstring activation in the low to middle range of motion.
Train Your Weakness: Front squats are a stiff test of core strength and the ability to maintain stability and rigidity when under load. If you find it difficult to keep your elbows elevated, your chest up, and your torso erect, your core is most likely the weak link. Adding some anti-flexion abdominal work to your program, a subset of core training that is often overlooked, can help tremendously. Barbell or ab-wheel rollouts, suitcase carries, and landmines are good exercises to train anti-flexion muscles.
Shoe Choice: This is another avenue to increasing stability and comfort in the front squat. The Olympic shoe you often see has a slight to moderate heel elevation to lessen the Achilles/calf stretch reflexes. This elevated heel makes it easier to squat because it allows a more natural occurrence of movement for those who do not have the proper mobility or range of motion. The heel can also help stabilize the lifter and put them in a safer line of motion. If you don’t want to squat with the shoes, then a slight heel elevation may allow the front squat to be safer and more comfortable. Some lifters don’t care and feel that a flat shoe is just as comfortable. Again, this is a decision the lifter needs to make. Try all three in training to see what works for you.
By Scott Paltos


You must be logged in to post a comment Login