


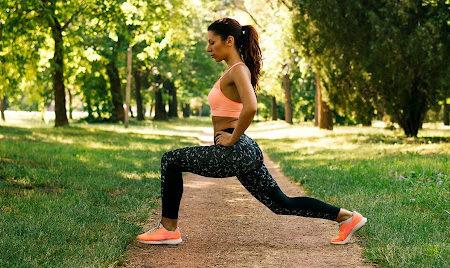
Every sports enthusiast understands how important it is to be able to jump high in certain athletic contests, such as basketball, volleyball and of course the high and long jumps. Many coaches and athletes don’t pay much attention to the skill, but they should because it can make a huge difference in performance and in the outcome of a competition. Take football, for example. If a wide receiver can outjump his defender, he has a decisive edge, and vice versa. If the defensive back can excel in the skill of leaping high, he can intercept or knock down a pass. Field goals and extra points are usually blocked by a player who can go up and get a hand on the ball.
How about baseball? Being able to jump high is a definite asset. Those highlight shots of an outfielder going up over the wall and snagging a ball on its way out of the park or an infielder elevating high enough to rob the hitter of a base hit occur because the players possess the skill. Being able to leap high certainly helps a tennis player. It’s also an advantage in lacrosse, since it enables athletes to shoot over opponents and net passes.
A soccer coach once asked me why I had his team doing calf raises twice a week. He thought their calves received sufficient work from all the running they did. I pointed out that once they increased the strength in those muscles, they’d be able to jump higher, which would give them an edge in heading the ball. It had never dawned on him that jumping was an integral part of the game.
In some sports, such as swimming, the value of being able to leap higher is subtle yet still valuable. Let’s say swimmers improve their leaping ability in terms of propelling off the starting block so that they hit the water four, five or six inches ahead of the other competitors in the race. Most races on the national and international levels are won by fractions; a powerful start can mean the difference between winning or placing or being back in the pack.
Watch javelin throwers. At the end of their throw, they’re leaping upward to add momentum to the javelin. Make the muscles responsible for that move stronger, and the distance will improve. Olympic lifters rely on an explosive finish, and that’s provided by the muscle groups that help you lift off the ground. At the very top of a clean or snatch, a lifter is jumping, again to add more lift to the bar.
Whenever coaches ask me to review a strength program, I scan it to see if there’s any specific exercise for the calves. There rarely is, and even if there is, it’s usually done with low resistance. They reason the way the soccer coach did, believing that their athletes get plenty of calf work with all the running and jumping they do during practices and games.
While it’s true that the calves get plenty of exercise during the performance of the sport, it isn’t enough to make them significantly stronger. If athletes want to improve their leaping ability, they must make their calves stronger—not necessarily bigger but definitely stronger. That can be achieved only with specialized work. The calves are a weight-bearing group and are stubborn. They must be stunned to get them significantly stronger.
Those who have jumping ability may not want to bother with any specialized work, but who wouldn’t want to be able to jump a couple of inches higher? I sure did because I loved playing basketball. So as soon as I came across my first set of weights, I included calf raises in my routine. Back then, calf machines were nonexistent. I fixed a bar across my back, set my toes on a two-by-four and worked my calves to exhaustion. It paid off. My jumping ability improved right away and enabled me to outrebound and shoot over taller opponents—and they mostly were, since I’m only 5’9”. My hands are too small to grip a basketball firmly, but I could dunk a volleyball, as could Bill March and Bob Hise Jr., two of my fellow Olympic lifters. They could dunk a basketball, and March would display his skill at the end of his lifting demonstration if a basketball goal was available.
The program I’m about to present worked for me personally, and I’ve used it for athletes in a wide range of sports. The topic always brings to mind a 6’3” guard on the basketball team at the University of Hawaii. We had a talented team that had gone to the National Invitation Tournament that season, and he’d spent most of the time on the bench. To add to his woes, Rick Pitino, an assistant coach, had gone out and recruited two blue-chip guards. The young man approached me and asked if there was anything he could do in the weight room while he was home during the summer to improve his chance of getting more playing time next year.
I told him that if he religiously followed the program I gave him over the summer, he could improve his leaping ability as well as his overall speed. That way, he might be able to impress the coaches when he returned to school in September.
The next time I saw him was when fall semester started, and he was extremely pleased with himself. He’d just been through some tests and had put four inches on his vertical leap and cut two seconds off his hundred-yard dash. He also dunked the ball, to the delight and surprise of the coaches and his teammates.
Coach Pitino told me that the improvement in his leaping ability had made him an entirely different and much better player. Now he battled the bigger players for rebounds and was able to use his jump shot more often because he could release it over his defenders. Although he didn’t gain a starting position, he did become the regular sixth man on a team that went to the NIT again.
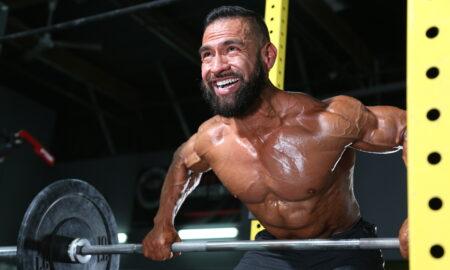
Certainly a four-inch increase is exceptional, but it’s far from rare. The reason most don’t achieve that degree of success is that they fail to apply themselves to the exercises that are key to the act of jumping: squats and calf raises. You have to attack both of them—the squats with heavy weights and the calf raises with lots of reps and plenty of resistance. Staying in the comfort zone just doesn’t get the job done.
Obviously, there are many muscle groups that take part in the act of jumping, along with their corresponding attachments. The hips and upper legs provide the initial upward thrust. Then the calves take over to assist in extending you higher. While I understand that the majority of the great leapers in sports are naturally gifted, I also know that anyone willing to put in the time and effort can enhance the skill. Typically, it’s the marginal player, like the University of Hawaii guard, who understands the value of being able to improve leaping prowess and conscientiously does strength training—and reaps the rewards of diligence and perseverance, two attributes essential for success in strength training at any level.
The routine for improving the ability to jump higher is extremely simple. It consists of squats and two forms of calf raises. The difficult part is putting in 100 percent effort at every session. If your legs and calves aren’t sore the day after you work them, you aren’t doing it right—that is, except for the light squat workouts.
Even though the program is uncomplicated, you need to be aware of several points in order to achieve the desired results. Number one, you must go low in the squat—not like a powerlifting squat, which barely breaks parallel, but rock-bottom low. The lower you go, the more you activate the quads, abductors, adductors and hamstrings—particularly the latter two, which play a major role in jumping. That’s why I like front squats. You have to go low in that version of squatting. Should you cut it off, you make the movement more difficult because it will force you to lean forward, and that puts a great deal of stress on your wrists and elbows as you try to maintain a secure rack.
Front squats aren’t essential, however, so if you can’t do them, stay with conventional back squats and discipline yourself to go lower and lower each time you do them. Most trainees can’t go low due to an inflexibility in the back of their calves, but the repetitions and heavier poundages will eventually enable you to achieve the needed flexibility in that area and sit in the bottom of a back squat.
Should you continue to have trouble going really low, try this. Set the pins in a power rack at a position lower than you normally go on squats. Squeeze under the bar, and squat from that low position. Return the bar back down to the pins, and come to a dead stop before doing the next rep. When you become comfortable with that position, lower the pins even more.
Following is a back squat program I give all my athletes once they’ve learned proper form and established a solid base. I’ve written about it before but will go over it again.
Monday (heavy day): five sets of five, working to max, with a back-off set of eight to 10 reps. Wednesday (light day): five sets of five, finishing with roughly 20 percent less than you handled on your final set on Monday. I say roughly because the percentage varies as you get stronger. When you’re handling 500×5 on your heavy day, you can use a bit more than 20 percent less (240 pounds). I don’t like making the light day so easy that you don’t have to pay attention to technique. That’s the primary purpose of the light-day concept.
On Friday (medium day) do two sets of five, then three sets of three, working up to five or 10 pounds more than what you did on your last work set on heavy day. In the early stages 10 pounds will be no problem, but later on five will be plenty. Follow that with a back-off set of eight or 10. The back-off sets will be 50 pounds less than the final set for that day until you start squatting in the high 400s or 500+ range. Then the weight selected for the back-off set depends on how you felt that day. That’s where a good coach is helpful. He can tell whether you can handle a hefty back-off set or need to pull back and use a relatively lighter poundage. If you train yourself, ask, “How hard was that work set? Tough? Not so bad? Do I feel drained or have lots left in the tank?”
The back-off sets should be demanding enough to force you to dig into your reserves but not so heavy that they drain you and adversely affect your next squat workout. Usually around 75 pounds less is right. When in doubt, less is better than more. You can always move the back-off set up the next time around.
To continue, at the following Monday, heavy session, you work the weights so you do the last set of five with the same weight you used for the last work set on Friday. As the triples increase, so do the heavy and light fives and the back-off sets. It’s an ideal formula for improving intensity and expanding your foundation in a synergetic fashion.
The complete routine appears on page 239, with sample poundages to show you how the formula works.
If you’ve read The Strongest Shall Survive, you know that I use a simple method of determining the top weight for the light day. It’s the same as the third set on the heavy day. That’s particularly helpful to coaches who are dealing with large numbers of athletes. Should you decide to do front squats, they belong on the light day. Do two sets of five followed by three to five sets of three and work them to max, because you’ll still be handling much less weight than you use on back squats.
I’m aware that there’s been some criticism of the five-sets-of-five-reps formula. Opponents claim that the light warmup sets are a total waste of time and that the workout would be more productive if the lifter skipped over the light weights and moved right to the work sets. That could be true for experienced lifters who have several years of hard training to their credit, but for competitive athletes who spend only part of the year in the weight room, it isn’t a smart approach. It’s inviting injury.
The lighter warmup sets serve several functions: They help prepare the muscles, tendons and ligaments for the stress of the work sets, they help hone technique and mentally prepare the athlete for the heavier poundages, and they add to the overall workload.
Once athletes have been training for some time and have built a solid strength foundation and perfected their form, they may choose to do fewer warmup sets and take bigger jumps to the work sets. But that idea doesn’t fit into the programs for beginners or intermediates.
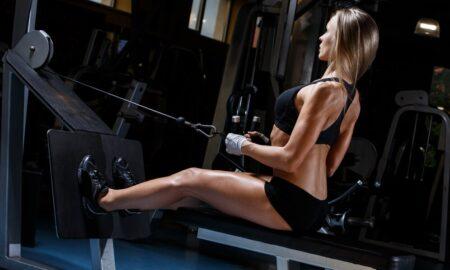
Now for the calves, or as my athletes learn to call them, “baby cows.” In order to strengthen the calves completely, you need to do two forms of calf raises—standing and seated. A brief bit of kinesiology will explain why. The calf consists of two groups: gastrocnemius and soleus. The gastrocnemius is the one most associated with the calf and is the larger and more prominent muscle. It has an inner and outer head and, when developed, highlights the back of the lower leg in a stunning manner. The gastrocnemius originates above the knee at the bottom end of the thigh bone, or femur, and extends downward to help form the Achilles tendon. Note the point of origin.
The soleus is smaller than the gastrocnemius and lies directly behind it. While not nearly as well known as its neighbor, the soleus is equally important in terms of overall calf strength. It originates just below the knee at the posterior surfaces of the tibia and fibula, the two bones of the lower leg. It extends downward and becomes part of the Achilles tendon.
The two muscles work together, not independently. They form a functional unit called the triceps surae. In order to maintain proportionate strength between the two groups and ensure optimum strength development, you have to work both of them, and you have to work them in slightly different ways because of their places of origin. Since the gastrocnemius begins above the knee, it’s exercised effectively only when the knees are locked. In contrast, the soleus is worked effectively only when the knees are bent because it originates below the knee.
I therefore recommend doing both standing and seated calf raises, which will bring a greater increase in strength and size than working just one or the other. Although I think the best approach is to do both at the same workout, that isn’t necessary. As long as you do both some time during the same week, you’ll get positive results.
As I mentioned above, the calves have to be abused to get them to respond. There are different opinions on sets and reps for them, but I like high reps to force those stubborn muscles to grow stronger—30s for three or more sets. I learned that at Muscle Beach in Santa Monica in the early 1970s, when lots of top-notch bodybuilders trained there. They’d do six sets of 30, pausing only long enough between sets to stretch.
First time I did that routine, I couldn’t walk right for several days, so I modify it for those starting on the two exercises—one warmup set followed by three tough work sets. The resistance will vary from individual to individual, but the rule for everyone is the same: By the time you reach rep 20, your calves should be screaming, “That’s enough!” That’s when you proceed to knock out 10 more reps and how you break calves out of their complacency.
Some pointers. Place your toes on a block, and make sure you can get a full range of motion. The block should be high enough that your heels can’t touch the floor at the bottom of the motion. You must do both the up and down movements in a smooth fashion and slower rather than faster. For added benefit, hold the topmost position for a second or two on each rep. There shouldn’t be any jamming or rebounding out of the bottom, as it’s potentially harmful to your knees and ankles.
While doing the standing calf raises, you absolutely must keep your knees locked. Otherwise, you’re not hitting the gastrocnemius nearly as well. We’ve all seen the idiots who load up a calf machine with 400 to 500 pounds and do what looks like quarter squats. It may be helping their quads, but does little for their calves.
I also see people cheat on the seated calf machine. They pull on the handles of the machine as if they were doing seated rows. It’s counterproductive. Make your calves do all the work, even if it hurts. Remember, that kind of pain is a good thing in strength training.
Most important, stretch your calves for a full minute as soon as you complete the set. Don’t wait until you’ve finished the entire workout before stretching. Those high reps flush blood into your calves, and the stretching helps both relieve them and make them more receptive to the next set. It’s also smart to stretch them again later on that night. That helps minimize soreness and cuts down on the risk of dinging your calves on the following day.
Although I think high reps are the most productive for ultimate calf development, I also believe that a change every so often is beneficial. Every couple of months, up the resistance and lower the reps to 15, 10 or even five. Double up on your sets. That should jar the muscles, and especially the attachments, and make them stronger. But do it only occasionally—and not until you’ve built a solid base.
How often should you work calves? It depends on what you’re trying to accomplish. Those who rely on their calves a great deal, like basketball and volleyball players, can benefit by working them three times a week in the off-season and once a week during the season. Twice a week is the norm for most. If you do them at your regular training session, be sure to put them at the end of your workout. If you do them early in your routine, they’ll have an adverse effect on any following exercise that involves the calves, and there aren’t many that don’t. Better yet, do calf work on nonlifting days. That way you can give them priority and hit them even harder.
What if no calf machines are available? You can do standing calf raises, as I did when I first started, or work inside a power rack. Ride the bar up the sides of the uprights to help balance the moving weight. Be sure to stand on a section of two-by-four or a block so you get a full range of motion. For the seated version, sit in a chair or on a bench, place something across your thighs to protect them, and then stack plates on the padding. With your toes on a block or phone books, proceed to do calf raises. Since the resistance is going to be much less than what you’d be handling on a machine, run the reps up to 75, 100, 125, or until you’ve lit them up to the point at which you know you’ve worked them thoroughly.
When you’re in a situation where there’s no equipment at all, do standing calf raises without any resistance. Again, ultrahigh reps are necessary.
By altering your foot placement—toes ahead, turned inward, turned outward—you can achieve even greater development and strength gains. Form is critical, however, for bodyweight calf raises to have the desired effect. When you start with your toes outward, you must extend your weight over onto your big toe at the finish, and when you point your toes inward, you have to press it onto your three lateral toes at the end of the move.
Whatever squat and calf program you select, make sure you apply yourself diligently on every rep on every set. Once you make your hips, legs and calves considerably stronger, you’ll begin to soar higher and higher. A heady feeling, to say the least.
Editor’s note: Bill Starr was a strength and conditioning coach at Johns Hopkins University from 1989 to 2000. He’s the author of The Strongest Shall Survive—Strength Training for Football, which is available for $20 plus shipping from Home Gym Warehouse. Call (800) 447-0008, or visit www.Home-Gym.com. IM


You must be logged in to post a comment Login