


Building a strong, functional physique is a process that requires constant scrutiny. Since certain exercises are more enjoyable than others, some bodyparts or areas of the body get considerably stronger and better developed than others. Some disparity in strength doesn’t pose a problem. Should that difference get way out of proportion, however, then some changes are in order.
Your relative weakness may not reveal itself as an injury or even cause pain, but you could experience diminished performance. Let’s say your squats have hit a standstill because your back rounds excessively when you get to the heavy work sets. The form breakdown causes you to get out of the proper positioning needed to grind the bar up through the sticking point. Same deal for the deadlift. When you get to the max poundage, your back rounds so much that you’re no longer in a position to bring the bar to the finish.
Those are common problems if you’re handling heavy weights on squats, deadlifts or any other heavy pulling exercise, and they’re caused by weakness in the middle back. So this month I want to focus on that frequently overlooked area of the body. Not only will a relatively weak middle back adversely affect a number of exercises in your program, but if you don’t give it the proper attention, you’ll eventually experience pain in that area. That could be a boon to M.D.s and chiropractors but not much fun for you.
To be sure, the back is one continuous plane, with the various muscles often overlapping, but I believe that when you’re setting up a routine, it helps if you think of it as having three parts: upper, middle and lower.
Anyone I talk with about middle-back exercises invariably thinks I’m referring to movements for the lats. True, the lats are one of the major groups in the midback, but there are lots of others. You may not realize that the traps form a large portion of the middle back. They originate at the base of the skull and spread out and down—hence the name trapezius, a type of quadrilateral. It sweeps down and connects to your spine at the last thoracic vertebra, right in the middle of your back. The traps extend over some of the latissimus, too, which means what works for one group usually works for the other.
Another muscle that makes up a part of the middle back is also named for its shape, the rhomboid. It lies beneath the middle of the trapezius. Here are the others: serratus anterior, serratus posterior, teres major, infraspinatus. They all extend into the upper back and are strengthened when you work that area. Anytime you work your middle back directly, you’re also strengthening your rear deltoids and the small groups that comprise the rotator cuffs—another excellent reason for doing some specific exercises for that area of your body.
That’s especially true if you’re infatuated with the bench press to the extent that you forsake all back work. The combination of hammering away on bench presses and neglecting to keep your back proportionately as strong leads you down the path to shoulder and rotator cuff problems that could easily have been prevented by including one or two core exercises for your middle and upper back.
You must have a strong middle back in order to squat, pull or press heavy weights. Yes, I include presses. If you doubt that you need a strong middle back for overhead exercises, try doing some when that area of your back is hurt. If you can do them at all, you’ll be restricted to very light weights. Should your midback injury be severe, you’ll discover that even some of the tamest exercises, like curls and crunches, are impossible to do.
A strong middle empowers you to maintain a perfectly flat back during the execution of a max attempt. A weakness may not show up until you try a really heavy weight. One thing is sure, though: If the signs are there that your middle back is lagging way behind and you don’t do something about it, you’re asking for an injury. Not only that, but a hurt midback has no mercy. You won’t be able to find a comfortable position: Standing, sitting and lying will all be painful.
ALLEven if you’re quite sure that your middle is as strong as your upper and lower back, it’s still a smart idea to have at least one specific exercise in your program for that part of your body. Can’t hurt, and it may save you some grief later. I’ve never heard anyone complain that his back was too strong. An ounce-of-prevention idea.
Some of my athletes were unable to handle much weight on specific exercises for their middle backs because their lumbars were too weak for them to hold the proper position on such movements as bent-over rows or long pulls on a machine. That’s especially true for older trainees and those trying to rehab their middle backs. In those cases I lay out a program of specific exercises for both the middle and lower back in equal doses. It works nicely. As their lumbars get stronger, they can handle more resistance on their midback exercises.
Which reminds me—since the lower back is involved in any exercise for the middle back, it’s always a good idea to warm up your lower back thoroughly before moving to whatever you have planned for your middle back. A high-rep set of hyperextensions—back hypers or reverse back hypers—will fill the bill.
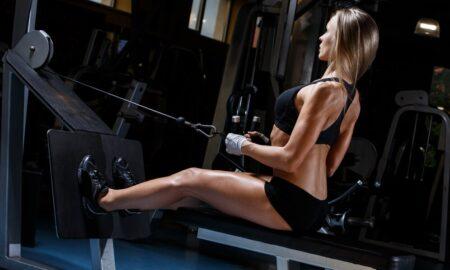
My favorite exercise for the middle back is bent-over rows. You can do them with dumbbells, but unless your back is very weak or you’re rehabbing it, use a bar. It’s much more effective simply because you can use so much more weight. It’s an easy lift to learn, yet there are several key form points. Place your feet at shoulder width, toes straight ahead. Bend your knees and lean forward while keeping your back tight and flat. Very flat. Let your arms dangle. That tells you where you should place the bar. It’s one of the few pulling exercises done with the bar away from your body.
The grip: Use straps. Although you may not need them for the lighter warmup sets, you will once the weights get heavy, so you might as well get used to them on the way to the higher numbers. I have my athletes vary their grip on each set. I have them start quite wide and, as the weight increases, slide their hands in a few inches until they end up using a clean grip, which is approximately a thumb’s length from the smooth center knurl on an Olympic bar. I alter the grip for a couple of reasons. The change works the back muscles in a slightly different manner, and the closer grip will be a bit stronger than the wider one, thus enabling you to handle more weight. More weight is always a good thing.
After you’ve set your feet firmly into the floor and made sure your back is flat and parallel, grip the bar, taking care that your grip is even. Look straight ahead, and pull the bar upward until it touches your chest. It should be hitting right at your nipples. Do the first few reps deliberately until you get the feel of the line, and then start being more aggressive with the upward motion. Try to bang the bar into your chest, but lower the bar back to the floor in a controlled manner. Never let it crash downward. That’s potentially harmful to your shoulders and elbows. Pause a brief moment at the bottom to make sure your back is flat and parallel before doing the next rep. The hardest part of doing bent-over rows is learning to keep your back in the same position throughout the lift. Your torso should not bend down to meet the bar or rise up at the end. I’ll amend that advice later; for now, maintain very strict form.
If you have bumper plates, use them. They’re easier on your joints, bar and floor. With bumper plates, however, there’s a tendency to rebound them off the floor to get a jump-start on the next rep. Don’t do that. It will adversely affect your line of pull and cause your back to move out of position or to round.
Start out with light weights so you can concentrate fully on your form. Do as many sets as you need to find the best way to lock your back in place, where to set the bar relative to your feet and where you want to grip the bar. During the learning stage, while you’re using light weights, use the same grip for all your sets. There’s a score on most Olympic bars 10 inches in from the collars. It’s there to help Olympic weightlifters find their correct grips for the snatch. Grip the bar so that your ring finger is around the score. That’s the ideal bent-over-row grip for most people.
The bar should travel in a straight line from the floor to your chest. I’ve seen many pull in a backward stroke so that the bar touches right at their navels. That’s not nearly as effective.
Another important point is often abused: Your knees must be bent. Not much, but they should never be locked. Models in magazines are frequently shown doing bent-over rows with locked knees, and young readers copy their form. It’s not only less beneficial, but it puts undue and unnecessary stress on the hamstrings as well. You’ll be able to handle much more weight when you bend your knees and at the same time will be lowering the risk to your hams.
I mentioned that your torso needs to stay parallel throughout the lift. After you’ve been doing rows for six to eight weeks and have added a considerable amount of weight to your final sets, you can cheat a bit.
Breaking from strict form might be a better term than cheating. When you cheat on a lift, you get inferior results. In this case, you get better action, and it’s safe. On your heavy sets do the first couple of reps with your back parallel to the floor. On the final sets elevate your torso at the end of the row. Not much, just enough for you to move heavier weights higher. That’s helpful because you’re still working your target muscles, and the upward movement is a means of overloading those muscles and attachments. Don’t adopt the technique, however, until you’ve established perfect form and built a solid base.
If you have a very weak middle and lower back or are in the process of rehabbing those areas, dumbbells might fit your needs more than a barbell. You can do dumbbell rows one arm at a time or both arms together. You can use more weight with one hand, but I believe doing them together is useful as well, since you force all parts of the middle back to work at the same time. Of course, there’s no reason you can’t do both styles, alternating them from week to week or workout to workout.
I have a friend who was recovering from back surgery. The bar was too heavy, and he felt that rowing the dumbbells simultaneously was more advantageous than doing them separately. His problem was that his back was too weak for him to hold the bent-over position long enough to do any reps. So he rested his forehead on the padded back of his recliner. That gave him the support he needed, and he was able to rebuild his back.
Another good midback exercise is long pulls done on a machine. As with all exercises, form is everything. If you let your upper body swing back and forth and use your legs to provide much of the force, then you’ll only get marginal results. Keep your upper body locked in an upright position, and make your middle back do all the work. If possible, vary your grip on the sets. Start wide, and move your hands in as the poundage gets heavier. I prefer higher reps on this one, four to six sets of eight to 10 reps. If you’re really piling on the resistance either in stacks or plates, though, lower the reps to five. Fewer reps done right are more productive than higher reps performed in sloppy fashion—a truism for any exercise in weight training.
What about T-bar rows? My answer has everything to do with the design of the machine. If the lifter can release the weight without having to twist sideways, fine. On the other hand, if he has to swivel his body in order to move the weight from the side and position it directly in front of him before commencing the rows, then I don’t like it. Twisting your torso while moving any amount of weight is potentially dangerous, and when you’re attempting heavy weights, the risk factor soars.
Against my advice, that type of T-bar rower was put in the Hopkins weight room, mostly for crew and swimmers. Not surprisingly, a number of athletes from those sports began coming to me and the trainer complaining of dings to their backs. Since I couldn’t get rid of the machine or discourage them from using it, I suggested that they get someone to assist them in moving the weights from the side to the starting position. Those who listened to me did all right. Those who didn’t continued to end up with aggravated backs.
Then there’s the method of doing T-bar rows that was used long before the various specialized machines came along. One end of an Olympic bar was fixed against the base of a wall. Weights were placed on the other end, and a bar from a lat machine or something similar was locked above the weights or under the collar of the bar. The lifter straddled the bar and proceeded to do rows. Sometimes, when a cross bar wasn’t available, the lifter just gripped the bar and rowed.
Here’s my view: If the bar and wall belong to you, well and good—go ahead and do them. If you’re training in someone’s facility or a university weight room, however, don’t do them. They wreck the expensive Olympic bar and damage the wall. Why not just do bent-over rows?
Rowing machines are especially good when you’re rehabbing your back, since the resistance isn’t that great. You get your workload in through the repetitions, which is what you want when you’re dealing with a hurt area.
Although the lats are very much involved in all of these exercises, you might want to focus on them even more. Wide lats add to any physique, and strong lats are extremely valuable in a great many sports activities, such as Olympic weightlifing, crew and swimming.
Chins top my list of lat exercises. There was a time when everyone who trained did chins, yet I rarely see people do them now, unless they have a special reason. Some jobs—fire departments, police and government security—include chins as part of their physical fitness tests.
If you’re looking for a wide flair, do chins with a very wide grip. Few do enough chins to warrant the need for straps, but if you feel they help, by all means use them. Always chin to the front, never behind your neck. As I’ve stated before, the shoulder girdle isn’t designed to deal with behind-the-neck movements. You can do more reps in the front, so to me it’s foolish to tempt fate. Why invite trouble? You’ll find plenty without asking for it.
I don’t much like helping someone through the sticking point when he’s chinning, just as I don’t like giving anybody the “all-you” during any other exercise. Weight training is not a team sport. Either you make the chin on your own, or you don’t. Otherwise, your numbers are based on false assumptions. When you get tested, no one is going to help you. Get used to it.
So how can you improve your chinning ability? I’ve known some who did weighted chins, but they were very advanced and already doing 20-plus without any resistance. The average person isn’t going to benefit from adding weight. Here’s the formula I give my athletes. It’s simple, and it works. Do four sets of as many as you can do, and then add the total number of reps. Our sample athlete did 10, 8, 7, 6, a total of 31. The next time he chins. his goal is to add at least one rep to his previous total. The increase is generally accomplished on the first set, although some do better after a warmup set. The athlete did 12, 8, 7, 6 for a total of 33 at his second chinning session. And so on and so forth. Should he not be able to add to the total on a certain day, he’ll do an additional set.
An athlete at Hopkins came to me requesting a program to improve his chinning strength because he was going to be tested in six weeks at the FBI Academy. He was able to do a dozen at the first workout. At the end of six weeks, he was up to 28 and breezed through the test.
There are several other reasons I like chins. They’re great for building bigger, stronger biceps, and who doesn’t like that? As they enhance strength in the biceps and the prime movers of the upper arm—brachialis and brachoradialis—that new strength can be used in all of your pulling exercises.
Chins also help me self-adjust my back. Just before doing my first rep, I exhale, relax my lower body, then explode upward to the bar. I can feel my back pop and the tightness lessen.
As I recommended for bent-over rows, move your hands in a tad on each set. Not much, because you want to hit your lats. About a thumb length is enough to make a difference.
Of course, pulls done on the lat machine hit the lats directly. You need to do them in a smooth fashion, not herky-jerky, and always to the front. Again, you can handle more weight in the front; why irritate your shoulders and rotator cuffs for no good reason?
An exercise that builds strong lats is the wide-grip high pull. Olympic weightlifters do lots of these to help them snatch more weight, and the top athletes in that sport have some of the most impressive lat development in the world. Use straps for these and stay with five sets of five until you’ve perfected the form and start handling heavy poundages; then do three sets of five, followed by three sets of three. Switching to lower reps will help you maintain your form.
Speaking of form, one of the main points to remember when doing any exercise for your middle back is to keep your entire back rigidly tight. Anytime you round your back, you diminish the benefits. The best way to maintain a locked back is by squeezing your shoulder blades together and keeping them in that position throughout the performance of the exercise. I realize that some rounding is inevitable when you get tired or load up the bar. Some is okay, but when it becomes excessive, stop. Lower the resistance so you can do the next set flawlessly.
A strong middle back is critical to long-term progress for any bodybuilder or strength athlete. The power generated by the legs, hips and lower back has to be carried through the middle in order for the upper back, shoulders and arms to use it. When the middle is weak, that transition doesn’t occur properly.
In addition, a strong middle is necessary for you to support heavy weights on your shoulders, back and overhead. It also enables you to maintain perfect technique on all pulling movements, front and back squats, jerks, snatches and presses. On the more practical side, keeping your middle back strong will save you a great deal of physical—and financial—pain.
Editor’s note: Bill Starr was a strength and conditioning coach at Johns Hopkins University from 1989 to 2000. He’s the author of The Strongest Shall Survive and Defying Gravity. IM


You must be logged in to post a comment Login