


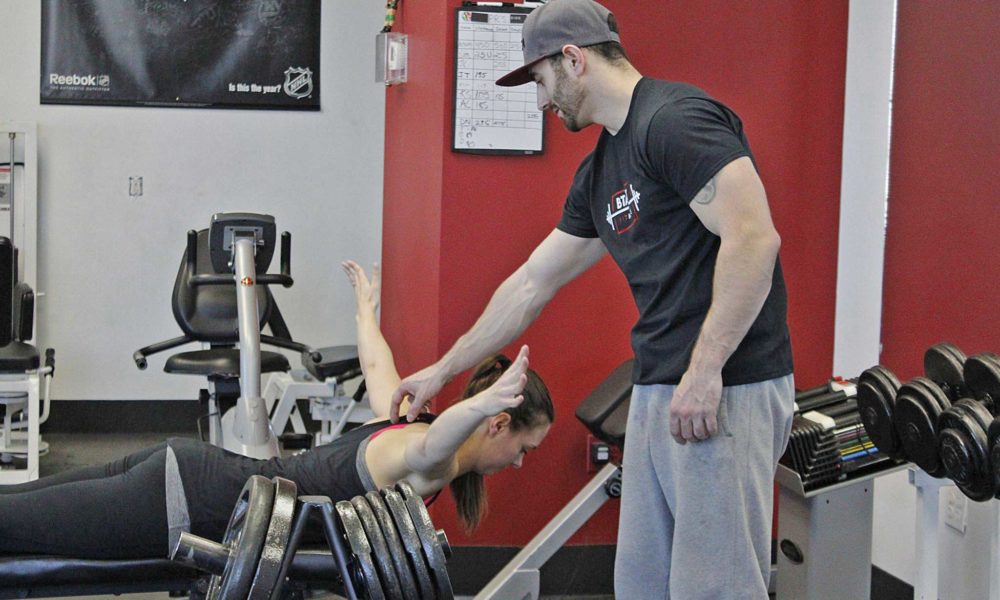
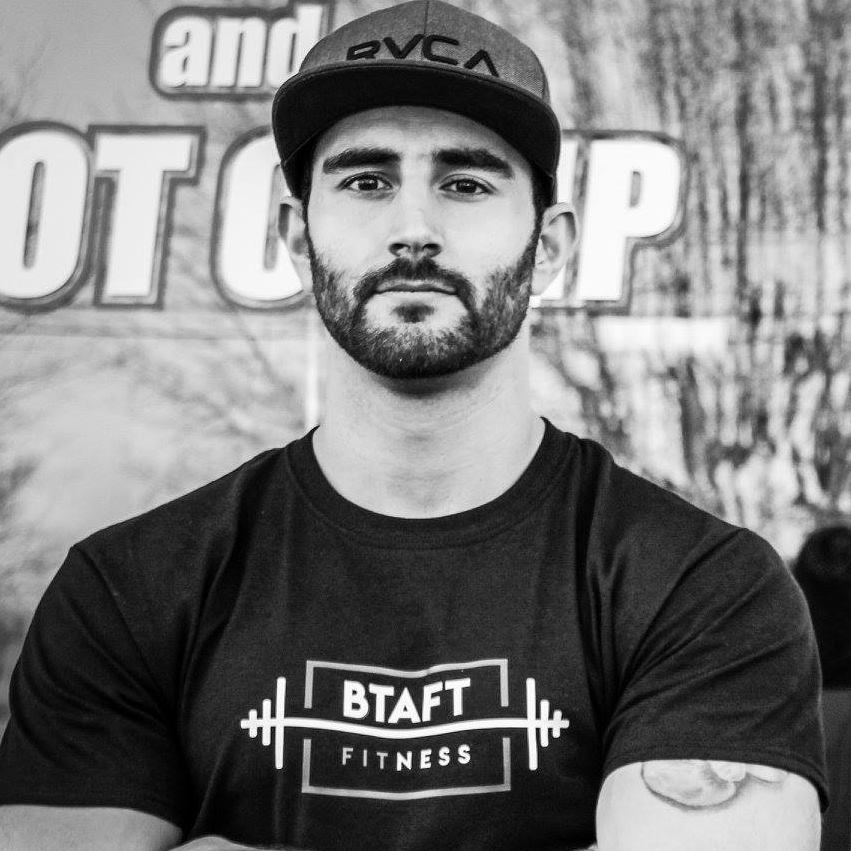
Author: Brandon Taft – BTaft Fitness – Rochester, NY – Personal Trainer
My Background Story
After becoming inspired by the Rocky movies as a kid, I began to take training very seriously by the age of 12. My mom hired me a personal trainer and I quickly excelled at being able to bench press 380lbs at a body weight of 165lbs before leaving high school. I expanded my training into boxing, mixed martial arts, and calisthenics to become more athletic and well-rounded. My plan coming out of high school was to become a personal trainer. I became certified but never followed through with training people.
Unfortunately, after high school I went through some difficult struggles in my personal life that caused me severe depression and I completely lost my fitness by the age of 21. I turned to excessive drinking and unhealthy eating which caused me to quickly become 55lbs heavier. I had no ambition to do any physical activity and my self-esteem plummeted. It was like everything that I once had completely disappeared and I didn’t recognize who I was any more… All I knew was that I was haunted day in and day out by the ghost of who I once was… I needed to get back to my roots.
The first two moves that I made was joining back up at the boxing gym and I called an extremely close friend of mine and asked if I could workout with him. My friend used to own a local pizza shop I hung out at growing up and was always a positive influence on me. We both shared a passion for fitness and I needed someone I could trust to hold me accountable. I began to tunnel vision boxing practice for two hours in the morning followed by working out with my buddy at the gym right after. I began to find my love for fitness again and my mind and body began to transform rapidly… It was during this time period I truly understood how important fitness was in every aspect of me as a person.
I am now a personal trainer and carry a deep passion for helping people become the strongest versions of themselves both mentally and physically. I do my very best each day to instill the right mindset when I am at the gym with my clients or talking to people online… I know what it’s like to feel like you’re at the bottom… but if you dig deep you’re not going to stay there and can accomplish great things on the other end of your struggles.
When training, it is important to train our entire body to avoid muscular imbalances and keep symmetry. To do this, we must target our muscles from multiple angles. I’m going to go over several exercises in this article that you can start incorporating in your routine next time you head to the gym.
CHEST EXERCISES
Working out chest is very important in any exercise program. Our chest muscles help with extending our arms in front of us and also pulling our arms towards the center of our body.
1. Bench Press
Muscles Targeted: Chest, Shoulders, Triceps
Step 1:
Choose a weight on the barbell you can keep strict form without losing form. This is super critical for avoiding injuries.
Step 2:
Lay down on the bench with your eyes lined up under the bar when it is rolled forward as much as it can go on the rack. Your feet should be on the floor.
Step 3:
Grab the bar slightly wider than shoulder width apart. I like to line the tips of my thumbs up with the smooth to rough part of the knurling and then grip the bar from there. Make sure your thumbs are around the bar when bench pressing. This is important to avoid dropping the bar on your chest.
Step 4:
Pull yourself up and get your shoulder blades squeezed together and down. Keep your feet on the floor and squeeze your glutes. Take a deep breath in and unrack the bar.
Step 5:
Keeping your elbows tucked, lower the bar to the lower portion of your chest. It should be right below your nipples. Press the bar up while breathing out hard through your mouth. Don’t overextend at the top to where your shoulders roll forward. Your shoulder blades should remain squeezed together and down throughout the entire bench press to avoid injury.
2. Incline Dumbbell Press
Muscles Targeted: Upper Chest, Shoulders, Triceps
Step 1:
Grab the dumbbells and set them on your knees. As you begin to lay back, kick your knees straight up in the air will help pop the dumbbells up towards shoulder level where you are ready to start the dumbbell incline press.
Step 2:
You should have your shoulder blades squeezed together and elbows should be slightly tucked in. This will help protect your shoulders when performing the incline dumbbell press. Press the weights straight up and bring them close together at the top of the movement.
Step 3:
At the top of the dumbbell incline press you want to squeeze your chest before lowering the weight in a controlled manner. It is important to not let your shoulders roll forward at the top. Keeping them back will allow you to get a much better contraction in the chest and keep you safe throughout the entire exercise.
- Pec Fly Machine
Muscles Targeted: Chest
Step 1:
Sit on the machine with your shoulder blades retracted and a slight arch in your back. This will put yourself in the best position to recruit your chest while on the pec fly machine.
Step 2:
Keep your elbows slightly bent and push the handles towards each other. Keeping your elbows slightly turned in and think about squeezing your chest throughout the entire movement.
Step 3:
At the top of the pec fly, squeeze your chest as hard as you can with the handles almost touching. I like to think of it like I was trying to crush a grape in between my chest cleavage.
Step 4:
Lower the handles slowly and get a full stretch before completing your next rep.
- Dumbbell Chest Fly
Muscles Targeted: Chest
Step 1:
It’s important to grab a pair of dumbbells when doing the chest fly that aren’t too heavy. This could cause access strain to the pecs since they will get a deep stretch and can lead to injury.
Step 2:
Press the dumbbells to the top position with your arms fully extended. Keep a slight bend in your elbows and let your arms descend towards the side of your body. It should look like you were opening up for a big hug.
Step 3:
Keep lowering your arms until you feel a nice stretch in your pecs. This is the bottom position of the dumbbell chest fly.
Step 4:
Bring the dumbbells back up to the top position in a semi- circle motion. Think of it like you were doing a hug around a big barrel. Make sure to squeeze your chest hard at the top of the dumbbell chest fly and repeat.
- Crush Press (Diamond Press)
Muscles Targeted: Inner Chest, Shoulders, Triceps
Step 1:
Grab 2 dumbbells and lay down on the bench. Your shoulder blades should be squeezed together with your feet on the floor.
Step 2:
The dumbbells should be in a neutral position on the center of your chest meaning your palms are facing each other and both sides of the dumbbells are touching each other. Keep pressure pushing the dumbbells into each other and press straight up.
Step 3:
Squeeze your chest hard at the top, lower the dumbbells under control and repeat.
- Chest Press Machine
Muscles Targeted: Chest, Shoulders, Triceps
Step 1:
Make sure the seat is at a height so the handles are lined up with your lower chest/ nipple area. Keep your feet planted on the floor with your shoulder blades squeezed together.
Step 2:
To target the outer chest, grab the outside handles that are parallel with the floor. To target the inner chest and triceps, grab the inner handles that are straight up and down. Keep your elbows slightly tucked and press straight up.
Step 3:
At the top of the movement, squeeze your chest hard before lowering. Be careful not to over extend at the top as this can lead to shoulder injuries. Your shoulder blades should remain squeezed together throughout the entire movement.
- Flat Dumbbell Press
Muscles Targeted: Chest, Shoulders, Triceps
Step 1:
Grab a pair of dumbbells and lay down on the bench. Make sure your feet are firmly on the floor and your shoulder blades are squeezed together. This will give you a solid base to press from and help keep your shoulders safe while dumbbell pressing.
Step 2:
Keep your elbows slightly tucked towards your sides and lower the weight the dumbbells to your lower chest nipple line. Press the dumbbells back up and bring them towards each other at the top. Squeeze your chest hard, lower the dumbbells and repeat. Make sure to keep your shoulder blades retracted the whole time. A common mistake is to over extend the dumbbell press at the top losing the tightness in your shoulder blades which can lead to shoulder injuries.
- Pushups
Muscles Targeted: Chest, Shoulders, Triceps
Step 1:
The starting position of a pushup should have your hands slightly wider than shoulder width apart. Turn your elbows slightly in and you are up on your toes. Everything should be in a straight line without your butt sticking way up in the air or your hips sinking down.
Step 2:
Lower yourself until your arms are fully bent. Your chest should almost be at the floor. Press back up squeezing your chest and triceps at the top of the movement. If you can’t do regular pushups, knee push ups are a great way to start. The form is the same except you are on your knees which takes away much of your body’s resistance. Doing pushups against a wall or counter are also good alternatives for beginners.
- Incline Diamond Press / Twist Press Combo
Muscles Targeted: Chest, Shoulders, Triceps
Step 1 (diamond press):
Lay down on the incline bench with your shoulder blades retracted. Keep the dumbbells in a neutral position with both sides of the dumbbells touching each other. Press straight up to the top and contract your chest. Lower the weights and repeat. Try to perform 8-12 reps before switching over to the twist press in Step 2.
Step 2 (twist press):
After completing the diamond press, immediately switch into the twist press. The rep starts off as a normal dumbbell press with your palms facing away from you at the bottom but as you press up turn the weights so that your palms are facing you. Bring the dumbbells together and squeeze your chest. Try to complete the twist press for another 8-12 repetitions.
BACK EXERCISES
Training back is very important for keeping great posture and providing symmetry in our body. Most of us have weakened muscles on the back side of our body due to the way society is. We are constantly sitting down, driving, and hunched over looking at our phones. This leads to a rolled forward posture and many other issues. The main function of our back is to assist with pulling both horizontally and vertically.
- Lat Pulldown
Muscles Targeted: Lats
Step 1:
Sit down on the lat pulldown machine with your knees under the pads and your feet extended in front of you. I prefer to take an overhand grip just outside of the bends on the angled part of the bar. The wider you grip, it will work higher up on your back.
Step 2:
Start by sitting straight up with your arms extended above you. Have your elbows slightly internally rotated. Lean slightly back and pull the bar towards your upper chest. You should have a slight arch in your back and squeeze your shoulder blades together hard when the bar is closest to your chest.
Step 3:
Let the bar raise up to the starting position in a controlled fashion and sit straight up again to allow the lats to fully stretch and repeat.
- Barbell Bent Over Rows
Muscles Targeted: Lats, Rhomboids, Lower Back, Biceps, Forearms
Step 1:
Grab the barbell a little wider than hip width apart. You can take either an overhand grip or an under hand grip. Over hand grip will target more of your upper back vs the under-hand grip.
Step 2:
Keeping your core tight, hinge at the hips as if you were performing a romanian deadlift. Row the weight up and back squeezing your shoulder blades hard at the top of the movement. A good cue to think about is driving your elbows towards your hips.
Step 3:
Lower the weight getting a full stretch and repeat.
- Dumbbell Lat Pullover
Muscles Targeted: Lats
Step 1:
Grab a dumbbell and lay down on the bench perpendicular. Your shoulders should be on the bench and the back of your head hanging slightly off. Make sure to let your hips sink for an extra stretch in the lats. If you are a beginner and this position is uncomfortable, laying normally on the bench will be fine.
Step 2:
Keep a very slight bend in your elbows and grab under the top plate of the dumbbell with both hands. Your hands should form a diamond pattern with the bar part of the dumbbell coming through your hands.
Step 3:
Extend the dumbbell as far back as you can behind your head until you feel a deep stretch in your lats and rib cage. pull the weight back up until it is straight up and down over your chest. Actively think about squeezing your back as you do this. A good cue to think about is driving your elbows towards your hips.
- Sumo Deadlift
Muscles Targeted: Hamstrings, Quads, Glutes, Back, Core, Forearms
Step 1:
Walk up to the bar making sure that you are standing in the center of the bar. This will be important when doing a sumo deadlift to make sure the bar goes up evenly. Take a wide stance and point your toes outwards. When you bend down you should feel a stretch in the inner thigh if you are standing wide enough.
Step 2:
Take a deep breath into your belly making sure your core is tight, arms are straight, and lat muscles are engaged. You are making your body as rigid as possible to avoid any form breakdown when you go to perform the sumo deadlift.
Step 3:
Hinge at the hips by pushing your butt backwards towards the wall behind you and bend your knees. When deadlifting your weight should be in your heels not in your toes to maximize leg drive and minimize the chances of throwing out your lower back.
Step 4:
Grab the bar with either a double overhand grip or one hand over and one hand under. Your arms should be straight up and down grabbing the bar inside of your legs. Drive through the floor with your feet and as the bar gets to about knee level, push your hips forward and squeeze your butt hard at the top to complete the movement. Lower the bar and continue performing for the desired amount of reps in your program.
- Seated Machine Row
Muscles Targeted: Back, Rhomboids
Step 1:
Sit up straight with a slight arch in your back. Taking the outer grip will hit more of the upper back while the inner grip will work more of the inner back.
Step 2:
Pull the handles back and squeeze your shoulder blades together. This will ensure you get the most back activation and minimize bicep recruitment. Lower the handles to the start position and let your lats stretch all the way forward before repeating.
- Dumbbell Renegade Rows
Muscles Targeted: Back, Abdominals
Step 1:
Grab two dumbbells and hold onto them in the high plank position (top position of a pushup). Your body should be in a straight line with your back flat and butt in line with your legs. Make sure your hips aren’t sinking or your butt isn’t sticking way up in the air.
Step 2:
Put your weight on one arm and row the other dumbbell up. You should be driving your elbow back and down towards your hip squeezing your back muscles. Set the weight down and repeat on the other arm.
- Cable Face Pulls
Muscles Targeted: Rear Delts, Rhomboids
Step 1:
Set the cable machine so that the rope is about eye level. Take an overhand grip on the rope ends with your arms fully extended.
Step 2:
Pull the rope straight towards your face spreading the rope apart when it gets close to you. Squeeze your shoulder blades together at the top of the movement and lower back to the starting position in a controlled fashion. Keeping a slight bend in your knees can help improve balance while doing the cable face pull.
- Close-Grip Cable Rows
Muscles Targeted: Inner Back
Step 1:
Grab the V-bar handle with a slight bend in the knees. Pull it until you are sitting straight up with your knees slightly bent.
Step 2:
Lean slightly forward as if you were doing a romanian deadlift. The lean forward is so you can get a full stretch throughout the lats. Keeping your elbows tight to your sides, lean slightly back and pull the weight back. Think about keeping your elbows low driving towards your hips.
Step 3:
At the top of the movement, make sure your shoulder blades are squeezed together tightly. Lower the weight back to the stretched position and repeat.
- Conventional Deadlifts
Muscles Targeted: Hamstrings, Quads, Glutes, Back, Core, Forearms
Step 1:
Walk up to the bar making sure that you are standing in the center of the bar. This will be important when doing a deadlift to make sure the bar goes up evenly. Stand about hip width apart with the bar lined up a couple inches away from your shins.
Step 2:
Take a deep breath into your belly making sure your core is tight, arms are straight, and lat muscles are engaged. You are making your body as rigid as possible to avoid any form breakdown when you go to lift the weight.
Step 3:
Hinge at the hips by pushing your butt backwards towards the wall behind you and bend your knees. When deadlifting your weight should be in your heels not in your toes to maximize leg drive and minimize the chances of throwing out your lower back.
Step 4:
Grab the bar with either a double overhand grip or one hand over and one hand under. You should be grabbing just outside of your legs. Drive through the floor with your feet and as the bar gets to about knee-level, push your hips forward and squeeze your butt hard at the top to complete the movement. Lower the bar and continue performing for the desired amount of reps in your program.
- Superman Extendouts
Muscles Targeted: Lower Back, Upper Back, Core
Step 1:
Lay down on your stomach with your arms extended in front of you and your feet together.
Step 2:
Lift your feet off the ground and arch your back in the superman exercise position.
Step 3:
Bend your arms back as far as you can driving your elbow down towards your hips. You want to keep your back tight squeezing your shoulder blades as you perform this movement. Rotate your palms towards the centerline of your body as you bend your elbows.
Step 4:
Squeeze your back and extend your arms back in front of you. Make sure to rotate your hands back over so you finish the superman variation with your arms extended and palms facing the floor.
LEG EXERCISES
If you want any sort of functional strength in life, training legs is an absolute must! Walking, running, jumping, and picking up objects all stem from the ground. Legs also provide stability when it comes to using our upper body. Legs also are the biggest muscle group in the body which means you will burn more calories during leg training helping you shed fat!
- Barbell Squat
Muscles Targeted: Quads, Hamstrings, Glutes, Core
Step 1:
Stand in front of the barbell and take a grip that is evenly spaced on the barbell that is comfortable. It will typically be slightly wider than shoulder with however some people prefer an even wider grip.
Step 2:
Keeping your hands on the bar, step underneath the bar and get your back tight. The bar should sit on your traps not high up on your neck. You will feel it sit properly almost as if you had a shelf built into your upper back. Get your feet a little wider than hip width apart and unrack the bar.
Step 3:
Take a couple slow and controlled steps back and get your feet slightly wider than hip width apart with your toes pointed slightly outwards. Point your elbows down, tighten your back and core, keep your head up, take a deep breath and and begin squatting down.
Step 4:
On the way down, keep your core tight and push your hips back as you are squatting down. You also want to be pushing your knees out. Letting them cave inwards is bad for your knees. Your weight should be more in the heels than the toes. Go down as far as you can naturally go with good form. Parallel is ideal but if your mobility doesn’t allow you to… don’t force it!
Step 5:
Explode up driving with your legs and back. A good cue is to think about pushing through your feet and pushing your upper back towards the ceiling. This will help your legs and hips engage simultaneously and help you prevent caving forward at the bottom of the squat. At the top of the squat, squeeze your glutes and repeat.
- Goblet Pulse Squats
Muscles Targeted: Quads, Glutes, Hamstrings, Core
Step 1:
Grab a dumbbell and hold it vertically by putting your hands under the top plate of the dumbbell. You want to point your elbows slightly up and keep the dumbbell close and high on your chest.
Step 2:
Stand slightly wider than hip width apart with your toes pointed slightly outwards. Keep your head up, core tight, and take a deep breath in before squatting down. Squat down as low as you can making sure you are pushing your knees out to the sides and not letting them cave inward. You also want to push your hips back and keep your weight more on your heels instead of your toes to avoid falling forward.
Step 3:
At the bottom of the squat, do a little bounce coming up about 3-4 inches and sinking back down before squatting all the way up. This will help target your glutes and hamstrings more than a normal squat. Squeeze your butt at the top and repeat.
- Barbell Romanian Deadlift
Muscles Targeted: Hamstrings, Glutes, Lower Back
Step 1:
Grab a barbell and stand up tall with your arms locked in front of you.
Step 2:
Keep your core tight and begin to bend forward by shooting your butt backwards and keep the weight on the heels. Keeping your weight on the heels vs. toes is critical with barbell romanian deadlifts to ensure you are activating your hamstrings. Keep the barbell close to your body as the barbell slides down your leg with your arms staying extended the entire time.
Step 3:
Once you get a little below knee-level or feel a deep stretch in the hamstrings, explode up by pushing your hips forward and lock out at the top by squeezing your butt hard.
- Walking Lunges
Muscles Targeted: Quads, Hamstrings, Glutes
Step 1:
Stand straight up with both feet together. Take a step forward with your right leg bending it to a 90-degree angle. You should have your heel firmly planted and shouldn’t be on your toes on the front foot. If your heel is coming off the floor, try to take a step a bit further out. Let your left knee sink down until it is about an inch or two off the floor.
Step 2:
Press through the heel of your right foot driving through the hamstrings and glutes. Once your leg is extended take a step forward and repeat this process with the opposite leg.
Step 3 (optional):
When using weights such as dumbbells or barbells you may want to take a step to the center first before stepping forward with the opposite leg. This will help with your balance and avoid an injury due to making a misstep.
- Hamstring Curls
Muscles Targeted: Hamstrings
Step 1:
Lay down on the hamstring curl machine with the pads resting just above your feet at the end of your calves.
Step 2:
Curl the weight up with control as high as you can and squeeze your hamstrings at the top. Lower the weight with control just short of lockout and curl back up. Locking out each rep at the bottom can cause hamstring injury and knee pain.
- Leg Extensions
Muscles Targeted: Quads
Step 1:
Sit on the leg extension machine and choose a weight that is challenging but you can perform without throwing the weight up. The goal is to isolate the quads without injury.
Step 2:
Extend your legs and squeeze your quads hard at the top. Lower slowly and repeat.
- Dumbbell Romanian Deadlift
Muscles Targeted: Hamstrings, Glutes, Lower Back
Step 1:
Grab a pair of dumbbells and stand up tall with your arms locked in front of you.
Step 2:
Keep your core tight and begin to bend forward by shooting your butt backwards and keep the weight on the heels. Keeping your weight on the heels vs. toes is critical with dumbbell romanian deadlifts to ensure you are activating your hamstrings. Keep the dumbbells close to your body as the weights slide down your leg with your arms staying extended the entire time.
Step 3:
Once you get a little below knee level or feel a deep stretch in the hamstrings, explode up by pushing your hips forward and lock out at the top by squeezing your butt hard.
- Goblet Box Squat
Muscles Targeted: Quads, Hamstrings, Glutes, Core
Step 1:
Find a bench or a box that is roughly the height you would sit on with your legs at a 90 degree angle. Grab a single dumbbell and hold it close to your chest with your elbows up.
Step 2:
Stand slightly wider than hip width apart with your toes pointed outwards. Squat down keeping your weight away from the toes and pushing your knees outwards on the way down. Sit back onto the box and explode up through your heels. Squeeze your butt at the top.
- Calf Raises
Muscles Targeted: Calves
Step 1:
Find a step or a flat elevated surface to perform the calf raise. If you can’t find something to stand on the flat ground will be okay. The purpose of the step is to allow your heels to sink down to get a deeper stretch taking the calves through a greater range of motion.
Step 2:
Stand on the step with your heels hanging halfway off. Press through the balls of your feet until you are up on your toes. Contract the calf muscles as hard as possible.
Step 3:
Lower yourself slowly until your calves go from being fully contracted to your heels are lower than the step and your calves are fully stretched. Repeat for the desired amount of reps or time.
- Box Step Ups
Muscles Targeted: Quads, Hamstrings, Glutes
Step 1:
Decide which size box you are going to use. A higher box is more challenging and will work more of your hamstrings and glutes than a lower box.
Step 2:
Place one foot flat on the box and the other foot about 6-8 inches away from the box. Drive through the foot that is on the box pushing through the heel not the toes.
Step 3:
Wait until your leg is fully extended before putting the other leg on the box. Keep the same foot on the box until you complete the desired reps then switch sides.
- Single-Leg Calf Raises
Muscles Targeted: Calves
Step 1:
Find a step or a flat elevated surface to perform the single-leg calf raise. If you can’t find something to stand on, the flat ground will be okay. The purpose of the step is to allow your heel to sink down to get a deeper stretch taking the calves through a greater range of motion.
Step 2:
Stand on the step with your heel hanging halfway off. Press through the ball of your foot until you are up on your toes. Contract the calf muscle as hard as possible.
Step 3:
Lower yourself slowly until your calf goes from being fully contracted to your heel is lower than the step and your calf is fully stretched.
Step 4:
After you perform the desired reps on the single-leg calf raise, switch legs. For more of a challenge you can try using dumbbells for increased resistance.
SHOULDERS
Shoulders are involved when it comes to lifting the arm in pretty much any direction. Our shoulder joint is a ball and socket which means it is very mobile but also very prone to injury. This is why it is important to train the shoulders from multiple angles to build strength and stability to our shoulder joint.
- Dumbbell Shoulder Press
Muscles Targeted: Shoulders, Triceps
Step 1:
Grab a pair of dumbbells and swing them up so your elbows are facing down and your hands are on top ready to push up. You can perform the exercise seated or standing. If you are standing make sure to keep your core tight.
Step 2:
Keep your elbows at a slight angle in front of you and press up to the top. Bring the dumbbells towards each other. Lower the dumbbells under control to about ear level and repeat.
- Front Raise To Side Raise
Muscles Targeted: Shoulders
Step 1:
Grab a pair of dumbbells and hold them with your arms fully extended and your thumbs facing the ceiling in the hammer position.
Step 2:
Begin by doing a front raise until your arms are parallel with the floor. Give the dumbbells a couple twists and bring them directly out to the sides giving them another couple twists.
Step 3:
Bring the dumbbells back towards your center line and turn them vertically so you are back in the hammer position. Lower them under control until your arms are extended down by your sides again and repeat.
- Overhead Press Machine
Muscles Targeted: Shoulders, Triceps
Step 1:
Sit on the shoulder press machine with your feet planted firmly on the floor. I prefer to grab the inner handles which can help keep your shoulders in a safer position.
Step 2:
Press straight up and lower the weight slowly until it is about ear level before pressing up again. Going too low beyond the ears can cause your shoulders to internally rotate and lead to shoulder issues.
- Front Raise To Shoulder Press
Muscles Targeted: Shoulders
Step 1:
Grab a pair of dumbbells with both of your thumbs facing the ceiling.
Step 2:
Keep your elbows slightly bent and perform a front raise until your arms are straight up overhead. Keep the elbows tight in front of you and bring the weights down to about ear level before pressing back up.
Step 3:
Perform the lowering portion of the front raise with your arms extended until your arms are by your sides again and repeat.
- Barbell Shoulder Press
Muscles Targeted: Shoulders, Triceps
Step 1:
Grab the barbell about shoulder width apart. In general you want to have a closer grip when performing a barbell shoulder press than you would when doing a barbell bench press. Going too wide on the barbell shoulder press can cause shoulder issues.
Step 2:
Keep your elbows tight in front of you, keep your core tight, and squeeze your glutes. Press the bar straight up overhead. On the way down stop at about ear level before pressing back up.
- Lateral Raise
Muscles Targeted: Side Delts
Step 1:
There are many different variations of the lateral raise but today we will be going over my favorite way to perform the exercise. Grab a pair of dumbbells you can do the lateral raise without swinging the weights. This will activate the side delts the best and help you avoid injury.
Step 2:
Keep your elbows slightly bent with the dumbbells by your side. Raise the weights to your side until your arms are parallel with the floor extended to both sides of you. At the top of the movement, your pinks should be facing the ceiling and thumb facing down as if you were pouring water out of a cup.
Step 3:
Lower the dumbbells in a controlled fashion until the dumbbells are by your side again. Try to not relax your arms entirely at the bottom to keep tension on your shoulders throughout the entire lateral raise.
- Plate Front Raises
Muscles Targeted: Front Delts
Step 1:
Grab a plate that you can perform the plate front raise without swinging the weight up. This will engage your front delts the most and help prevent injury.
Step 2:
Keep your elbows very slightly bent, grab the side of the plate. Keep your core tight and raise the plate up until your arms are parallel to the floor.
Step 3:
Lower the plate so your arms are by your sides again in a controlled fashion. Try not to let your arms completely relax at the bottom to keep tension on the front delts the entire time.
ARMS
Arm training is what most people think of when it comes to working out. Everyone wants to build big arms while some athletes actually believe direct arm training is a waste of time. Training arms is NOT A WASTE OF TIME! Direct arm training is essential not only for filling out those sleeves, but also assisting pretty much any upper body exercise.
- Bench Dips
Muscles Targeted: Triceps
Step 1:
Start the bench dip exercises with your legs straight out in front of you, your back a few inches away from the bench, and hands just outside of shoulder width apart. Your fingertips should be facing away from you and you are pressing through your palms on the edge of the bench.
Step 2:
Lower yourself until your arms are about at a right angle. Going too low can cause shoulder problems so go as low as you feel comfortable going. Press yourself back up pushing yourself slightly away from the bench. Squeeze your triceps as hard as possible at the top and repeat.
- Barbell Bicep Curl
Muscles Targeted: Biceps
Step 1:
Stand straight up keeping your core tight and back straight. A slight bend in the knees can help you stabilize and prevent swinging as the weight gets harder.
Step 2:
Take an underhand grip with both palms facing the ceiling about shoulder width apart. Your elbows should be tight to your sides. Curl the weight all the way to the top and squeeze your biceps. Make sure to not let your elbows drift forward in order to keep the most tension on the biceps possible.
Step 3:
Lower the weight under control all the way down and repeat.
- Tricep Rope Pushdowns
Muscles Targeted: Triceps
Step 1:
Stand a couple of inches away from the rope and grab the ends of the rope. Keep your elbows nice and tight to your body.
Step 2:
Push the rope down without letting your elbows drift away from your body until your arms are fully extended at the bottom. Spread the rope and flex your triceps hard. Let the rope come back to the top of the starting position in a controlled fashion and repeat.
- Dumbbell 21’s Bicep Curl
Muscles Targeted: Biceps
Step 1:
Grab a pair of dumbbells that you can perform a bicep curl without swinging. This is important for maximizing the utilization of the biceps and preventing injury.
Step 2:
With your palms facing the ceiling, perform 7 reps doing just the bottom half of the curl. Your arm should be going from fully extended to having your forearm parallel with the floor.
Step 3:
After finishing the 7 reps of the bottom half of the range, perform 7 reps doing just the top half of the curl. Your forearm should go from parallel to your arm being fully bent. Make sure to keep your elbows pinned to your sides the entire time and don’t let them drift forward.
Step 4: After you complete 7 reps at the top half of the curl, finish off with 7 reps of a full curl from arms fully extended to arms fully bent.
- Bent-Over Dumbbell Curls
Muscles Targeted: Biceps
Step 1:
Grab a pair of dumbbells and hinge over at the hips with your arms fully extended. It should look like you were doing a deadlift with the dumbbells except your palms are facing up.
Step 2:
Keep your elbows slightly in front of your body and curl the weight up to the top position without letting your elbows move. This will isolate the biceps entirely. Lower the weight back to the starting position in a controlled fashion.
- Single Arm Overhead Tricep Extension
Muscles Targeted: Triceps
Step 1:
Grab a dumbbell and press it straight up overhead. You want your arm slightly leaning back to put the tricep in the most stretched position.
Step 2:
Bring the dumbbell down behind you and then press straight back up without letting your elbow move. This is an excellent exercise for the long head of the triceps and is one of my favorite isolation exercises.
- Cable Overhead Tricep Extension
Muscles Targeted: Triceps
Step 1:
Grab the tricep rope and spin around with it so it is above your head. Putting one foot in front of the other with a staggered stance can help improve balance.
Step 2:
Keep your elbows tight and extended slightly while raised in the air. This will isolate the triceps as much as possible. Let the rope come back overhead in a controlled fashion until your elbows are fully bent and the triceps are in a fully stretched position.
Step 3:
Push the rope in front of you without letting your elbows drift forward. Go until your arms are fully extended and repeat.
- Barbell Taft Curls
Muscles Targeted: Biceps
Step 1:
Choose a weight on the barbell you can keep strict form without swinging the weights.
Step 2:
Curl the weight half way up and bring back to the bottom position. Now perform a full range curl. On the way down, stop half way and perform a half rep at the top.
- Spider Curls
Muscles Targeted: Biceps
Step 1:
Spider curls are an excellent way to isolate the biceps and build strength in the biceps for the top half of the curl. Lay down on your stomach on the incline bench with your arms hanging by your sides and palms facing the ceiling.
Step 2:
Curl the weight all the way to the top without letting your elbows drift forward. This is important to get the most isolation on the biceps during the spider curl.
Step 3:
At the top of the spider curl, squeeze your biceps and let the weight down nice and slow.
- Dumbbell Plate Curls
Muscles Targeted: Biceps
Step 1:
Grab a dumbbell and hold it vertically. You want to put your palms flat on the bottom of the plate on the dumbbell.
Step 2:
Keep your elbows pinned to your sides and begin to curl the weight up. Keep your palms flat and the top of the dumbbell flat throughout the entire curl. This will keep the most amount of tension on the biceps. Squeeze your biceps hard at the top of the dumbbell plate curl.
Step 3:
Lower the weight in a controlled fashion and perform for the desired reps and sets in your workout program.
- Skull Crushers
Muscles Targeted: Triceps
Step 1:
Skull crushers are one of the best exercises for strengthening the triceps. When performing skull crushers, you can either use a straight bar or EZ curl bar. Your hands should be about a foot apart. If you are using an EZ curl bar, use the inner bends for hand position. Push the weight straight up off your chest and this will be the starting position unless you have a spotter to hand you the weight at the top position.
Step 2:
Squeeze your shoulder blades together and keep your elbows tight. Your arms should also be slightly leaning back towards your head to keep optimal tension on the triceps when doing the skull crusher. Lower the bar in a slow and controlled fashion towards the back of your forehead.
Step 3:
One the bar is almost touching your forehead, press up and extend until your arms are straight. It is important to not let your elbows shift around when doing a skull crusher. Keeping your elbows slightly back towards your head and tucked throughout the entire movement will ensure that the triceps get the most recruitment possible.
- Cable Curl 21s
Muscles Targeted: Biceps
Step 1:
When performing cable curls it is important to choose a weight that you can control without swinging the weight. Cable curl form is very important! This will isolate the biceps and help prevent injury.
Step 2:
Keep your elbows nice and tight to your sides and begin the cable curls by performing 7 reps in just the bottom half of the curl. Your arms should go from being fully extended to your forearm being parallel with the floor.
Step 3:
Once you perform 7 cable curls in the bottom position, curl the weight 7 reps in the top half of the movement. Your forearms will start parallel with the floor and end in the fully contracted position.
Step 4:
Once you complete 7 reps of the top half of the cable curl, perform 7 full reps of the cable curl. Keep your form strict and make sure not to let your elbows drift forward during the movement!
- Incline Dumbbell Curls
Muscles Targeted: Biceps
Step 1:
When performing incline dumbbell curls it is important to grab a weight that you can control without swinging the weight. This will isolate the biceps and help prevent injury.
Step 2:
Start the incline bicep curl by lying on the incline bench. Your elbows should be slightly back, arms fully extended with your thumbs facing towards the ceiling. The dumbbell should be vertical. Keep your elbows nice and tight by your sides and begin to curl the dumbbell up.
Step 3: About halfway through the curl, rotate your hand so that your palms are facing up and squeeze your bicep at the top of the movement. Make sure your elbows don’t drift forward.
Step 4: Lower the dumbbell in a controlled fashion and turn the dumbbell so that your thumb is facing the ceiling about half way through the descent.
- Alternating Dumbbell Curls
Muscles Targeted: Biceps
Step 1:
When performing alternating dumbbell curls it is important to grab a weight that you can control without swinging the weight. This will isolate the biceps and help prevent injury.
Step 2:
Start the alternating bicep curl with your thumbs facing towards the ceiling. The dumbbell should be vertical. Keep your elbows nice and tight by your sides and begin to curl the dumbbell up. Start with either your left or right arm.
Step 3:
About halfway through the curl, rotate your hand so that your palms are facing up and squeeze your bicep at the top of the movement. Make sure your elbows don’t drift forward.
Step 4:
Lower the dumbbell in a controlled fashion and turn the dumbbell so that your thumb is facing the ceiling about half way through the descent.
Step 5:
Perform the curl with the other arm and rotate until the set is complete.
- Plate Hammer Curls
Muscles Targeted: Biceps, Forearms
Step 1:
Grab a weighted plate with your hands on the sides. If the weight has a ridge on it, face the ridge away from you and grab with your fingers for extra grip.
Step 2:
Keep your elbows tight to your side and curl the plate all the way to the top. Don’t let your elbows drift forward to ensure that tension is placed on your biceps throughout the entire exercise.
Step 3:
Lower the plate slowly and repeat.
CORE
Core training is essential not only to have a well developed looking midsection once you burn the fat off your body, but also to improve overall functional strength. The core allows you to channel power from your lower body to your upper body. Having a weak core also increases your chances for injury dramatically!
- Russian Twists
Muscles Targeted: Abdominals, Obliques
Step 1:
Sit down with your legs bent. You can either clasp your hands together or use a weight or medicine ball for added resistance.
Step 2:
Keep your feet 6-8 inches off the floor or on the ground for beginners. You want to lean back slightly and begin rotating side-to-side. The farther you lean back the harder it will be. Make sure you keep your core tight and are rotating at the hips not just moving the arms. Perform for either time or reps.
- Sit Ups
Muscles Targeted: Abdominals
Step 1:
Lay on the ground on your back. If you are a beginner, pinning your feet under something or having a partner hold your feet may make the exercise easier to perform giving you better leverage. Keep your arms crossed and your legs bent at roughly a 90-degree angle.
Step 2:
Sit up as high as you can contracting your abs at the top of the sit up. Lower yourself all the way down and repeat.
- Ankle Biters
Muscles Targeted: Obliques, Abdominals
Step 1:
Lay down on your back with your legs bent. Lift your upper back off the floor and keep your abs contracted.
Step 2:
Keeping your hands on the floor, slide your left hand towards your left ankle squeezing the obliques and then your right hand towards your right ankle squeezing the obliques. Repeat for as many reps or time as your workout requires you to do.
- Crunches
Muscles Targeted: Abdominals
Step 1:
Lay down on your back with your arms across your chest. Some people prefer to grab behind the head. If you do this make sure you don’t crank on your head when you begin to get tired. Doing this can lead to neck injury!
Step 2:
Crunch up as high as you can and squeeze your abs at the top of the movement. Let yourself down nice and slow making sure to not use momentum during the crunch movement.
- Flutter Kicks
Muscles Targeted: Abdominals, Lower Abdominals
Step 1:
Lay flat on your back with either your hands under your butt or out to the sides. Under your butt is easier while holding your hands out to the side is more of a challenge.
Step 2:
Keep your legs locked out and point your toes down. Flutter your legs up and down without letting your heels touch the ground. Try to come within an inch or two of the floor at the bottom of the flutter for maximum ab engagement.
- Planks
Muscles Targeted: Abdominals, Lower Back
Step 1:
Kneel down with your hands folded and your arms at a 90 degree angle. Your forearms should be flat on the floor with your face above your hands.
Step 2:
Step your legs out behind you so that you are holding yourself up just on your feet and forearms. Your back should be flat. Make sure your butt isn’t sticking way up in the air or your hips aren’t sinking down. Keep your core tight and hold for as long as your set requires you to.
Note: You can also perform the high plank which the form is the same except your arms are locked out. The high plank should look like you are at the top position of a pushup.
- Abdominal Crunch Machine
Muscles Targeted: Abdominals
Step 1:
Set the machine at a weight you can perform a crunch without using momentum. You want to be able to contract your abs and lower it with control.
Step 2:
Sit on the machine with your elbows on the pads. To target the abdominal region, pull down and bring your elbows towards your knees. If you want to focus on the obliques, turn both legs towards the side so you are doing a sideways crunch. Think about driving your elbows towards your hips in the oblique variation.
- Plank Taps
Muscles Targeted: Abdominals
Step 1:
Start in the high plank position. This looks like the top of a push with your hands about shoulder width apart. Your back, butt, and legs should be in a straight line. Don’t let your hips raise too high in the air or sink.
Step 2:
Take your right hand off the ground and touch your left shoulder. Put your right hand back down and repeat with your left hand touching your right shoulder.
- In & Outs
Muscles Targeted: Abdominals
Step 1:
Lay flat on your back with your arms fully extended behind you.
Step 2:
Lift your arms and feet off the ground. Crunch your knees in towards your chest while sitting up bringing your elbows towards your knees. Contract your abs as hard as possible.
Step 3:
Extend your legs and arms back out until you are in a fully extended position. Try not to let your heels or arms touch the ground throughout the in and out exercise.
- Bicycle Kicks
Muscles Targeted: Abdominals, Obliques
Step 1:
Lay down on your back with your hands on your head. You should be lightly touching your head making sure you aren’t cranking on your neck throughout the movement.
Step 2:
Raise both of your feet off the ground to engage your abs. Drive your knees towards your chest in a circling motion as if you were pedaling a bicycle. You will be rotating your upper body simultaneously so that your left elbow goes towards your right knee, and your right elbow goes towards your right knee.
- Leg Lifts
Muscles Targeted: Abdominals, Lower Abs
Step 1:
Leg lifts are an excellent exercise for your abs. Either lay on your back with your hands underneath your butt or you can put your arms out to the side if you want more of a challenge. If you lift your head and back slightly off the ground, your upper abs will be engaged along with your lower abs. Some people find this variation hard on their neck. If you feel pain lifting your head, don’t do it and keep your head flat on the floor.
Step 2:
Keep your legs as straight as possible and lift your legs off the ground. Try to lift it to where it is at a steep angle but not straight up and down. This will keep the most amount of tension on your abs.
Step 3:
Lower your legs in a controlled motion and try to not let your heels touch the ground.
CARDIO
Cardio training is an important aspect of fitness that will help you increase your endurance, burn extra calories, improve heart health, and improve recovery time.
- High Knees
Muscles Targeted: Legs, Core, Cardio
Step 1:
Stand with your feet about shoulder width apart and your hands in front of you about stomach level.
Step 2:
Jog in place getting your knees as high up as possible. Try to touch your hands without bringing your hands down to your knees but rather your knees up to your hands.
- Elliptical Training
Muscles Targeted: Cardio, Full Body
Elliptical machines are an excellent way to simulate running without the added stress to your joints. It can be used for people with joint issues or anybody looking to get in a good cardio workout.
The 2 main settings are the resistance and incline. Increasing these settings will make it more challenging. If your elliptical has handles, grab the handles and pedal your feet. I prefer to go forwards but you can also pedal backwards.
You can either jog on the elliptical at a steady pace or you can do intervals in which you go as fast as you can and then go at a regular pace before going fast again.
Common patterns I like to use with my clients:
50 seconds regular pace, 10 seconds sprint. Repeat this for whatever duration you are on the elliptical for.
20 seconds regular pace, 10 seconds sprint, 20 seconds regular pace, 10 second sprint. Repeat each minute like this for whatever duration you are on the elliptical for.
10 seconds regular pace, 10 second sprint, 10 seconds regular pace, 10 second sprint, etc.
- Treadmill Training
Muscles Targeted: Cardio, Legs
The treadmill is one of the most versatile pieces of equipment in the gym which can aid in improving your cardio and help with weight loss. Try out these variations:
Walking:
Walking on a treadmill is relatively easy and low impact. It serves as a great warmup and cooldown. Walking is a great way to burn extra calories and most people can do this exercise without any issues.
Walking on an incline:
Walking on an incline is a challenge compared to walking on no incline. It will get your heart rate up more, burn calories faster, and will improve endurance in your lower back and legs. This is a great alternative to jogging for people with joint issues but want to get their heart rate up! Walking with weights will make this even more challenging and also work on your core & shoulders.
Jogging:
Jogging will get your heart rate up much more than walking and burn calories at a faster rate. It also can help improve athletic performance and strengthen your legs. If you have knee issues this might not be the best option for you.
Sprinting:
Sprinting is a very aggressive exercise that’ll burn the most amount of calories in the shortest period of time. It will help improve endurance dramatically, strengthen your legs, and build explosive power. This is an excellent option for athletes but isn’t recommended at all for people with joint issues.
- Track Sprints HIIT
Muscles Targeted: Cardio, Full Body
Step 1:
Warm up by either jogging around the track or walking around the track a few laps. You want to get some blood flow to the muscles before sprinting. Doing some light stretches is also a good idea.
Step 2:
There are many different events you can sprint on the track but my favorite workout is the 100 meter. It is an all out burst, relatively short, and the way I do it provides not much rest break to improve your endurance and cardio.
Step 3:
Go to the starting line at the beginning of the straight away. Sprint as fast as you can to the end of the straight away. Don’t slow down until you cross the finish line. Take a slow walk back to the starting line and then turn around and sprint again.
Step 4:
This will leave you exhausted. Make sure to build up to doing more laps and don’t overdo it which can lead to injuries. You will rapidly progress and be able to do 10 rounds or more eventually without any issues.
STRETCHING/ MOBILITY WORK
Stretching and mobility work is important when it comes to an overall fitness plan. It helps ensure that you can perform exercises through their entire range without losing form. Stretching will also help you feel loose, increase power, and help avoid injuries. There are 100s of stretches but here are a few simple ones I recommend doing every day.
- Calf / Ankle Stretch
Muscles Targeted: Calves
Place your hands against the wall and extend one leg back. With the leg behind you, drive your heel towards the floor. When you drive your heel towards the floor it should hardly touch. This will give you an optimum stretch.
- Quad & Hip Flexor Stretch
Muscles Targeted: Quads, Hip Flexors
Kneel down on one knee. The other leg should be in front of you at a 90 degree angle with your foot planted on the floor. With the leg behind you, drive your hip forward and down as much as possible. Hold the stretch until you feel loose and repeat with the other leg.
- Groin / Hamstring Stretch
Muscles Targeted: Groin, Hamstring
Start off by standing as wide as you can pointing your toes slightly outwards. Try to keep your back flat and hinge over at the hips touching the floor with your hands.
- 90-90 Stretch
Muscles Targeted: Piriformis, Hips
This stretch will help with the lower back and glutes. Place one leg behind you and one in front of you at 90 degrees. Keep your back nice and tall and lean forward until you feel a deep stretch. Once you feel loose switch sides.
CONCLUSION
If you took the time to read and watch this entire blog post I just want to say thank you and I hope you found this valuable! There are 100s of exercises and it can be a little confusing on which ones you should or shouldn’t be doing.
Exercise selection and programming all depends on your goals and what exercises your body will allow you to do properly. An NFL football player is going to be exercising much differently than a 65-year-old retiree just looking to stay healthy.
If you are looking to get in awesome shape, burn fat, build muscle, and improve your confidence both physically and mentally check out my FOREVER FIT 36 course!
What’s included:
22-page nutrition guide
36 weeks of daily workout plans
Video tutorials on exercises and important exercise terminology
Check out Forever Fit 36 Here: https://www.btaftfitness.com/forever-fit/
Instagram: https://www.instagram.com/btaftfitness/
Twitter: https://twitter.com/btaftfitness/
Facebook: https://www.facebook.com/rochesternyfitness/
Linkedin: https://www.linkedin.com/in/brandon-taft-965068156/
Youtube: https://www.youtube.com/btaftfitness/
Website: https://www.btaftfitness.com/


You must be logged in to post a comment Login