


I remember the first time I was exposed to sled pushes. It wasn’t exactly a sled that I was pushing but a car that broke down and had to be moved. As one friend controlled the steering wheel, my other friend and I pushed the car. My legs quickly started burning and perspiration soaked my shirt. I looked up and realized that we were only half-way to the destination! When we finally finished, I collapsed on the asphalt for 10 minutes. Fortunately for my ego, my friend who was pushing the car with me was right along-side of me.
When I first became a strength and conditioning coach, I programmed the sled mainly for conditioning purposes. I used it with my athletes at the end of their training session as a means to increasing their cardiovascular capacity. It works wonders with athletes who usually have to give all-out efforts in a sporting event for a short amount of time, while tak-ing planned or unplanned rest periods throughout the game (football play-ers, MMA fighters). My athletes hated it, but the benefits were unparalleled.
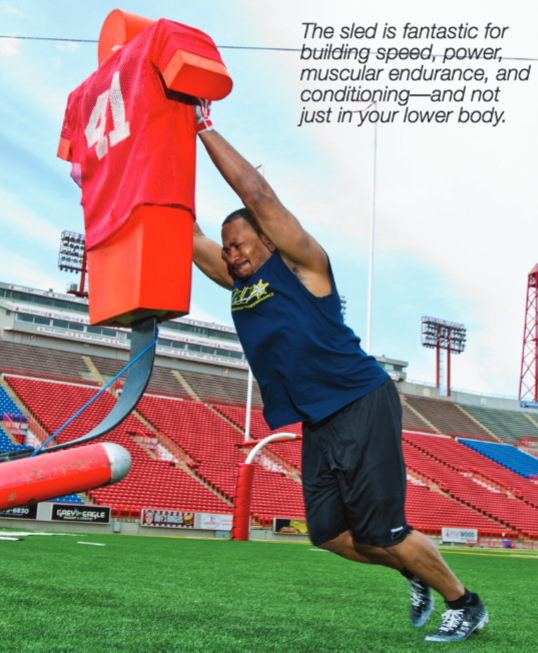
As I became more knowledgeable and more creative, I realized the uses of the sled are abundant. This implement is fantastic for building speed, power, muscular endurance, and conditioning—and not just in your lower body. The majority of all fitness equipment manufacturers make some version of the sled, so access to one shouldn’t be much of an issue.
Sled Benefits
Sled pushing helps to improve speed and acceleration. According to a study published in The Journal of Strength and Conditioning Research, resisted sprint training allowed for an increase velocity by nine to 10 percent in subjects’ five-meter and 10-meter sprint times. The distance gained and the explosive manner that allows for maximal velocity is created by an athlete’s rate of force production. The more force put into the ground by an athlete, the more distance they will be able to cover. Sled sprints help to produce the strength and power needed for such acceleration.
Most sleds can be used on any surface—grass, artificial turf, pavement, or rubber flooring—with each option providing a different challenge. Artificial turf is great for sprinting or training where less resistance from the ground is desired. Pavement is good for conditioning and developing mental strength. The bumpy surface requires a steady determination to getting the job done. Most of the athletes I work with hate when we take the sleds out on the pavement.
Pushing a sled for distance, time, or a predetermined number of reps is a great way to build a bulletproof physique and to develop deep conditioning. One of my person-al favorite exercises is sled suicides. Performing suicides without any resistance is an old-school conditioning drill. However, add a sled to the equation and the effectiveness of this exercise just increased dramatically.
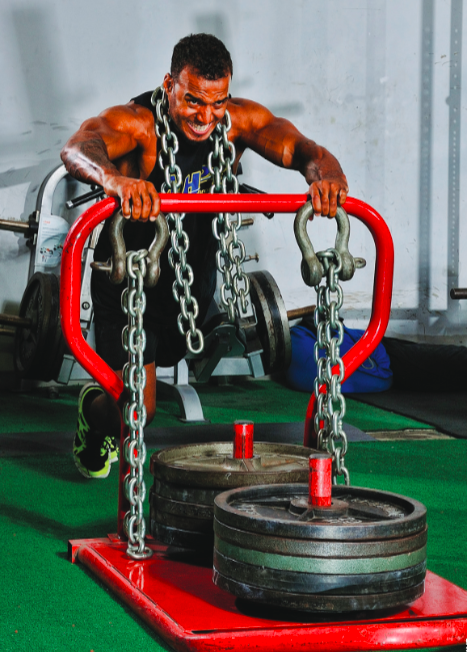
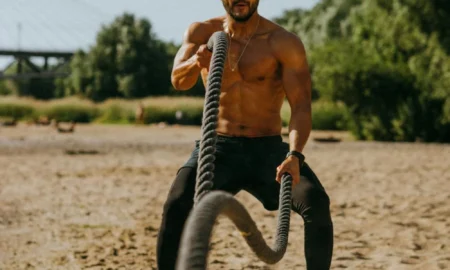
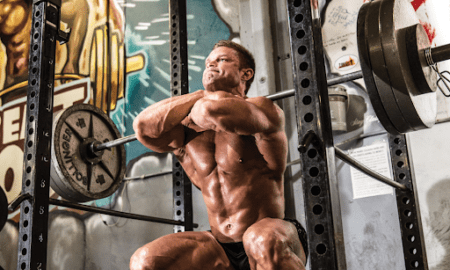
Sleds are not only great for developing legs and lungs but can be used as a true total-body workout. Attach a rope to the sled and do some sled pulls. If you have straps, you can do chest presses and rows, as well.
When we have athletes who are in-season or someone who may be recovering from another grueling workout, or even someone in a rehab setting, sled pushes are a great way to train without accruing too much soreness. The eccentric phase (muscle stretching) of any exercise is when most of the muscular damage occurs and the main cause of post-training soreness. Since pushing the sled doesn’t include an eccentric phase, it makes it easier to tolerate and won’t fry your muscle fibers.
In today’s alternate fitness universe, sleds are starting to pop up in more and more gyms regardless of their clientele. If you’re serious about training, then invest in a sled or find a gym that has one.
SLED GAMES
The workout below is a total-body session that can be used as a finisher or a main workout. You will need a sled, weight plates, a battling rope, and straps for pulling. Try to get through this workout without any rest between exercises. Once completed, take between one to two minutes’ rest before you start again.
Rope Sled Pulls: Attach a rope to the weighted sled. With the rope fully extended, pull it aggressively, bringing the sled toward you. The total pull will most likely be deter-mined by the length of the rope. Once the sled is pulled to you, immediately take the rope off.
Sled Suicides: With the weight still on (or taken off, de-pending on your conditioning) push the sled 10 yards. Then turn it around and push it back. Immediately push it 20 yards and back, and then 30 yards and back. Have your straps ready and attach them to the sled when you’re done with this segment.
Chest Presses: Walk out in front of the sled with the straps in your hand, facing away from the sled. Make sure there is no slack in the straps as you put one foot in front of the other. Press the sled out explosively using just your chest and arms. Walk out until there is no lag again, and repeat the process. Continue doing this for 30 yards.
Sled Rows: Once you’ve completed the chest presses, turn around and face the sled. With your arms out in front of you and knees slightly bent, pull the sled toward you as if performing a row. Walk back to create tension on the straps and repeat. Continue doing this for 30 yards
Cornell Hunt is a Certified Strength and Conditioning Specialist who trains athletes in Fairfield, New Jersey. He is the Xtreme Trainer for Team MHP. For more information, visit mhpstrong.com or huntforstrength.com.


You must be logged in to post a comment Login